 PCI Case
...help you build "IT" better
Call us: 0870 300 3388 (UK) +44 1908 272770 (Int)
Email: pcisales@pcicase.co.uk
 PCI Case
...help you build "IT" better
Call us: 0870 300 3388 (UK) +44 1908 272770 (Int)
Email: pcisales@pcicase.co.uk
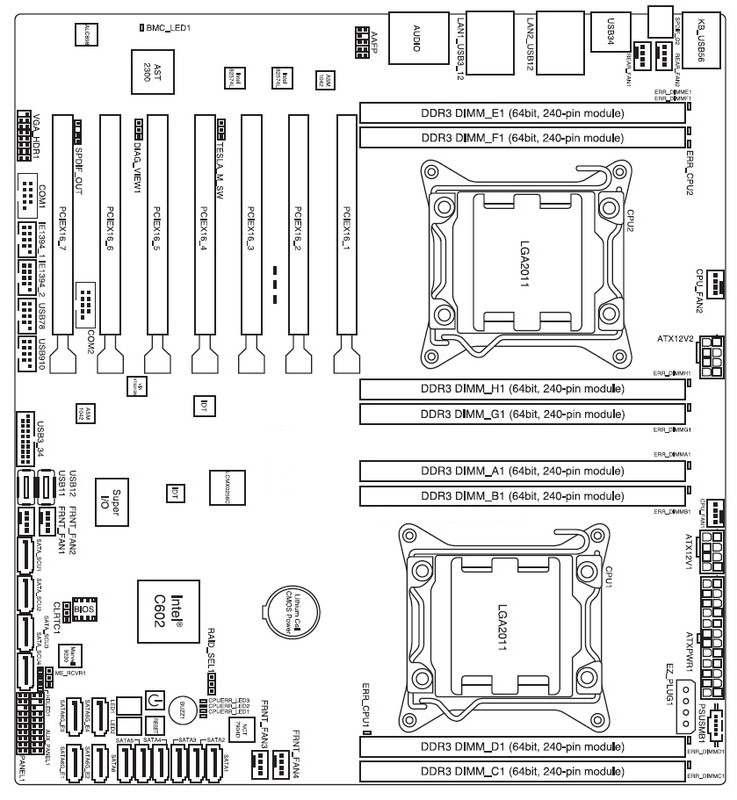
What is defined as Slot 1 on a motherboard can become very confusing when purchasing Riser Cards for your build. In order to simplify and make the ordering process straight forward, please use the motherboard layout as a guide. As you will see, when the I/O Sheild/Panel is in the top right corner, PCI Slots are counted from right to left.
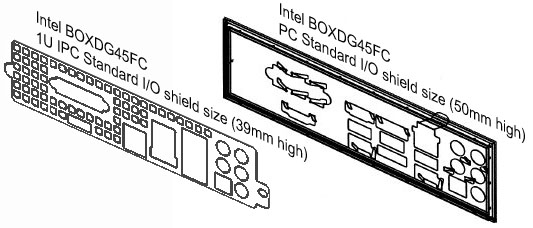
Detailed below is the comparison between a 1U I/O shield and a Standard Form Factor I/O shield. Due to Standard Form Factor motherboards being higher than the height of a 1U chassis, it will obviously not fit in a 1U build. Although this is a common problem throughout the industry, PCICase can offer you a solution.
PCICase recommend that if you are planning multiple builds with the same motherboard, the OEM I/O Shield Service (IPC-IO####) is an ideal solution for you, if however this is not the case or you are planning to use different motherboards, PCICase suggest purchasing the Universal 1U I/O Shield. *This product is only compatible with PCICase 1U Chassis
For instructions, please click <here>
The increase in performance of PCI Express is directly a result of doubling the bandwidth per generation (by increasing the BUS speed) or increasing the lanes (connections that are used to communicate between the receiver and transmitter), which will allow more data throughput. What is great about PCI Express is that it is upwards and downward compatible, thus meaning that in theory, any PCI Express component can be installed into any slot, however there are limitations with bandwidth either due the component or slot transfer rate. When using slots that are not directly designed for that card, you should always check to ensure that the design of the component does not intrude with the slot.
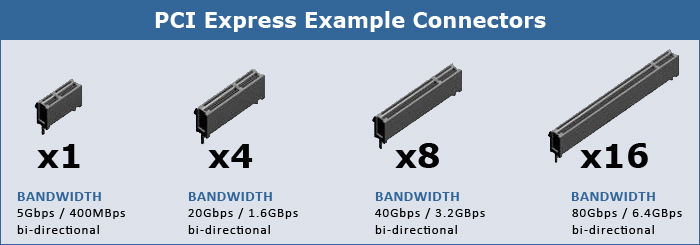
Detailed below are PCI Express cards that use the most common slots.
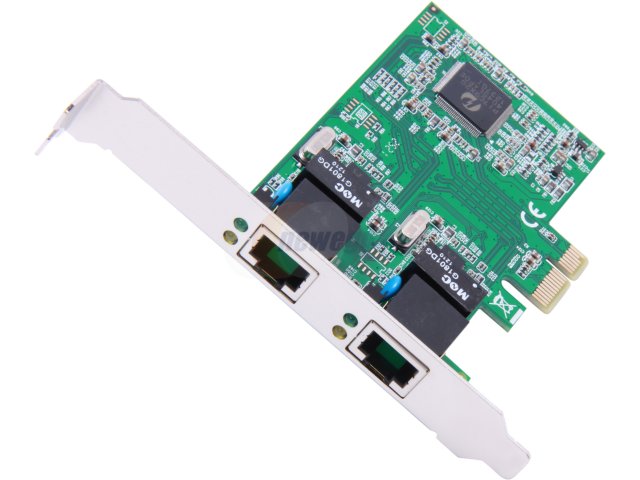
PCI Express x 1
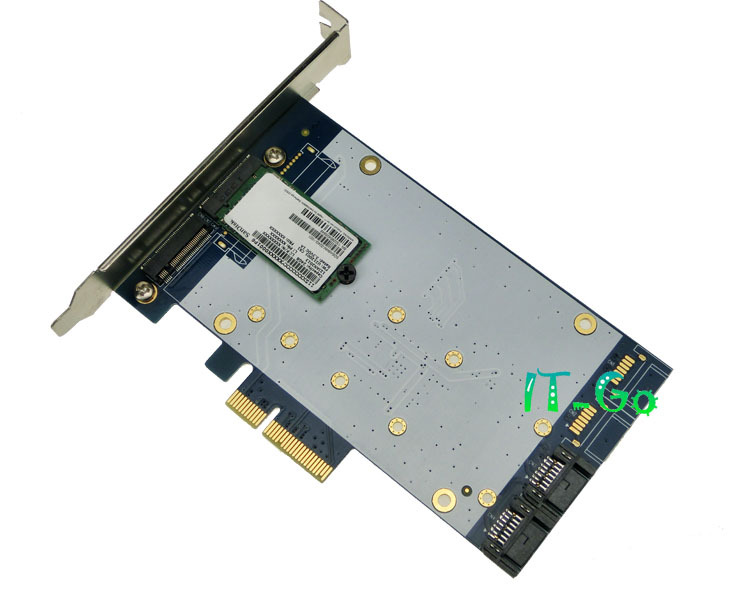
PCI Express x 4
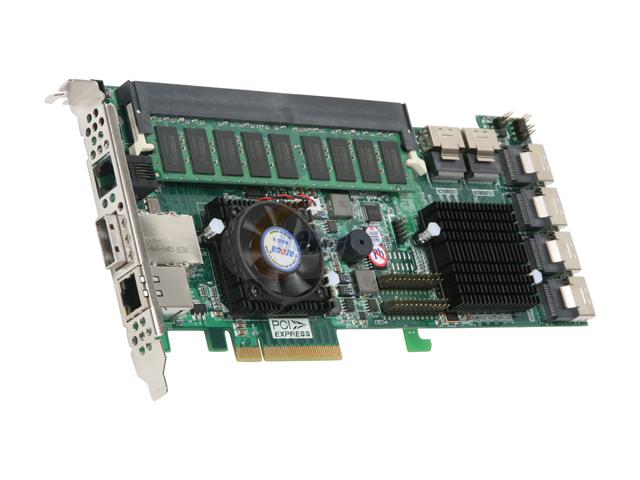
PCI Express x 8
PCI Express x 16

SAS controllers are comptible with SATA drives, however a SATA controller (i.e. the one that is on board a standard PC motherboard) is not and will require a controller card.
The standardised configuration for the LED light indicators are:-
* Please note that standard factory defaults are set for SATA HDD via a jumper configuration, which is set in accordance to the correct interface (i.e. SATA or SAS). If the behaviour of the LED is inconsistent to the standard configuration, please check the jumper settings, details can be found on the Rear Hot-Swap Settings.pdf.

| Pin | Name | Colour | Description |
|---|---|---|---|
| 1 | 3.3V | Orange | +3.3 VDC |
| 2 | 3.3V | Orange | +3.3 VDC |
| 3 | COM | Black | Ground |
| 4 | 5V | Red | +5 VDC |
| 5 | COM | Black | Ground |
| 6 | 5V | Red | +5 VDC |
| 7 | COM | Black | Ground |
| 8 | PWR_OK | Gray | Power Ok is a status signal generated by the power supply to notify the computer that the DC operating voltages are within the ranges required for proper computer operation (+5 VDC when power is Ok) |
| 9 | 5VSB | Purple | +5 VDC Standby Voltage (max 10mA, max 2A in ATX 2.2 spec) |
| 10 | 12V | Yellow | +12 VDC |
| 11 | 12V | Yellow | +12 VDC |
| 12 | 3.3V | Orange | +3.3 VDC |
| 13 | 3.3V | Orange | +3.3 VDC. ATX V2.3 / EPS12V V2.92 both define that the PSU has to use remote sensing to compensate cable drops on the 3.3V line. Because of this there is an additional brown cable crimped together with the orange cable either to pin 13 (ATX) or pin 1 (EPS12V). |
| 14 | -12V | Blue | -12 VDC |
| 15 | COM | Black | Ground |
| 16 | /PS_ON | Green | Power Supply On (active low). Short this pin to GND to switch power supply ON, disconnect from GND to switch OFF. |
| 17 | COM | Black | Ground |
| 18 | COM | Black | Ground |
| 19 | COM | Black | Ground |
| 20 | -5V | White | -5 VDC (this is optional on newer ATX-2 supplies, it is for use with older AT class expansion cards and can be omitted on newer units) |
| 21 | +5V | Red | +5 VDC |
| 22 | +5V | Red | +5 VDC |
| 23 | +5V | Red | +5 VDC |
| 24 | COM | Black | Ground |
PF= Power Factor (calculated by True Power/Apparent Power).
va = voltage amps
kilovolt-amps = watts / (1000 × PF)
Calculating Power Factor Example:- 119.365w /169.256va = 0.705 Power Factor (Result must be between 1-0)
